Installing the Pitot Mast April 11th, 2010
The pitot tube included in the RV kit is just a bent piece of aluminum tubing. Nothing wrong with that, but I wanted a “real” pitot tube like any other grown-up plane. In addition, I am still leaning towards using Dynon for my instrument panel. They have a pitot tube with an Angle-of-Attack, which I would like to use instead of a stall warning horn.
So, I ordered a pitot mast from SafeAir. It gets riveted to the main spar and to the bottom skin. It comes with a paper template, which you simply tape up to the bottom skin and then cut out. One important thing to point out is that the template was originally drawn for an RV-6. For an RV-7, the template needs to be slightly offset outboard. This allows the pitot mast’s plate to clear the rib that sits next to it.
The bottom of the template is aligned with the edge of the bottom skin and then you just got at it to make the hole for the mast. I used a unibit to remove as much material as possible.


After I couldn’t take any more material out with the unitbit, I used a dremel tool with a little sanding drum to finish shaping the hole to match the template.
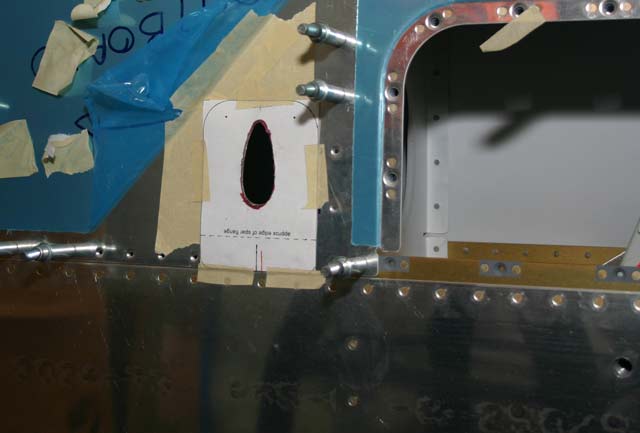
It took a bit of trial and error, but finally the hole was just the right shape for the pitot mast to slip through.
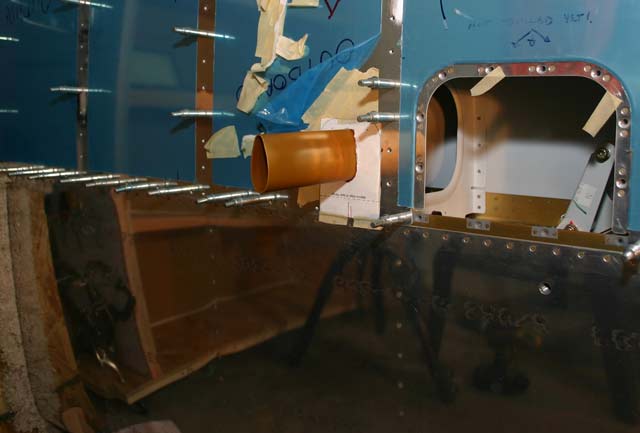
The template is supposed to be held by three rivets through the main spar and two other rivets at the opposite corners. This wasn’t as solid I would have liked, so I added a little piece angle. This angles has three rivets going through the pitot mast plate and the bottom skin, and three blind rivets to the adjacent rib. This makes things a lot more solid.