Riveting the Bottom Skins April 10th, 2010
I ordered a pitot-static-AOA plumbing kit from SafeAir. After drilling one extra hole in the ribs for the AOA line, I figured I was ready to rivet the bottom skins on.
After helping another builder rivet his bottom skins on, I decided to not put in the wire conduit in the ribs until after riveting the skins. Sure, it was going to be a pain to do it afterwards, but it would have been more of a pain to try to rivet 1-2 rivets per rib with the conduit in the way. In the end, I ended up pushing in the conduit one rib at a time. After completely riveting one rib, I would push in the conduit and then move on the next rib.
I found I could reach all but 3 of the inboard skin rivets (on the bottom spar, between two of the wing-walk ribs). I used pop rivets here. Better that than a banged-up bottom spar and half-assed solid rivets. I did the entire inboard skins without having to bend it back. I guess having skinny arms has some advantages. Also, I found it easier to do it all myself. Since I had my arm inside the wing holding the bucking bar, and I could not see while riveting. I had perfect control on when to stop the rivet gun if the bucking bar slipped, etc. After setting a few rivets, I would use a flashlight and an inspection mirror to make sure the shop heads turned out OK. I was pleasantly surprised at how few rivets I had to drill out for the entire bottom skins!
For the outboard skin, there is just no way to rivet it without folding the skin back. This is not as scary after you’ve done it. For a given ‘bay’, I would first do all the rivets along the bottom spar. Then I would rivet the rib, but only halfway down. I would then move to the rear spar on the next bay, and halfway down on the rib (since the wing is upside down, ‘down’ actually means ‘forward, towards the leading edge’). I would then move back to the previous bay and finish the rib. After the rear spar and both ribs were riveted in a bay, I would then do the line of rivets along the main spar. Overall, this was not as bad as I was expecting…
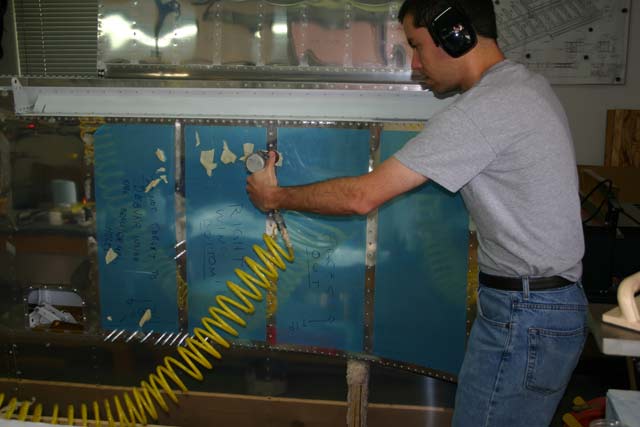
Here are a couple of shots of my gorilla-arm abilities. Note how the skin is folded back. Van’s suggests laying the wing on a table while riveting the bottom skins, but I found it much easier to just do it on the wing cradle. By keeping the wing in the cradle, I was able to squeeze between the skin and the skeleton and stick my hand through the rib holes to buck the rivets. Being skinny as a weasel helps, too.

These were probably the hardest on the outboard skin – not a whole lot of room to squeeze my body between the skin and skeleton, but still too far away to just stick my hand in through the outboard rib. But again, not too bad compared to trying to reach the rear spar rivets on the inboard skin without folding back the skin…